
Testing circuits, components, or prototypes can be exciting—but one wrong connection or voltage spike can fry your board, burn out an LED, or worse. A quality adjustable bench DC power supply is your safest bet: it lets you control voltage and current precisely, with built-in protections like OVP (over-voltage), OCP (over-current), and short-circuit safeguards that wall adapters simply can't match.
In this step-by-step tutorial, we'll walk you through how to use a Kiprim DC power supply safely for everyday testing—from powering an Arduino project to debugging a shorted board. Whether you're a beginner or experienced maker, these steps help prevent damage and give you confidence.
Why Use a Bench DC Power Supply for Testing? Unlike fixed adapters, Kiprim supplies allow you to:
- Start at 0V and ramp up slowly
- Set current limits to protect sensitive components
- Monitor real-time voltage/current draw
- Recover quickly from mistakes (thanks to protections)
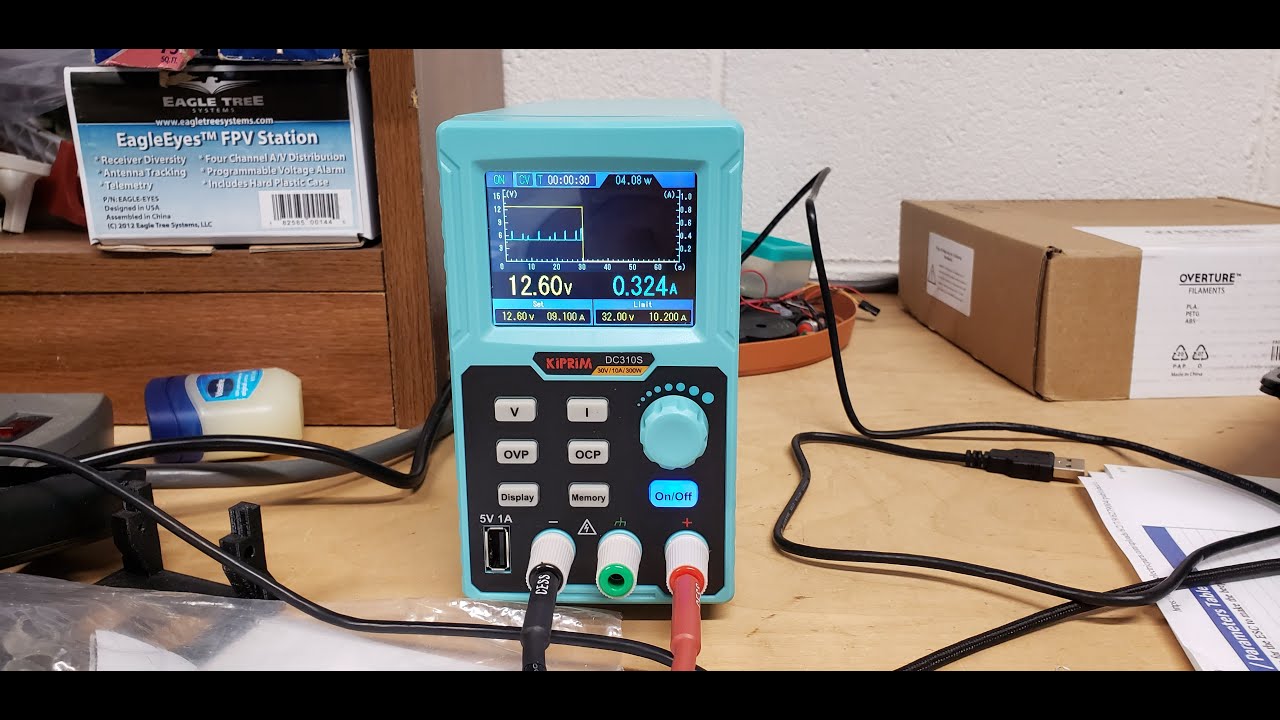
Kiprim models like the programmable DC620S (0-60V/0-20A, 400W) or the versatile DC310Pro (2-in-1 power supply + multimeter) make this easy and reliable.

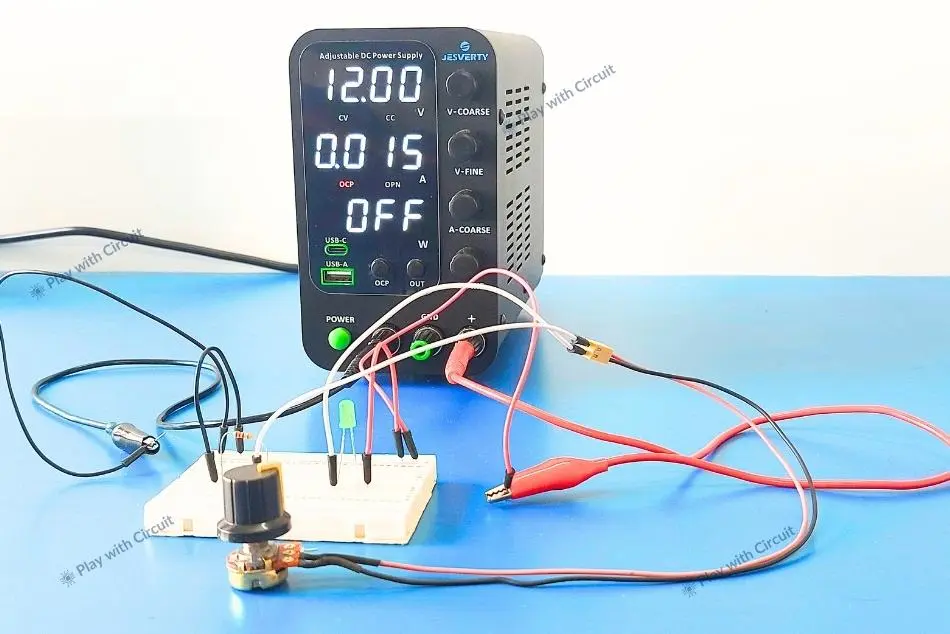
Step 1: Prepare Your Setup
- Place your DC power supply on a stable, non-flammable surface.
- Gather: alligator clip leads (banana to clips), your circuit/board, multimeter (for double-checking), and safety glasses.
- Ensure the power supply is off and all knobs are at zero.
- Connect the output terminals: red to positive (+), black to negative/ground (-). Use banana plugs or clips securely.
Step 2: Power On and Set Initial Safe Parameters
- Turn on the power supply.
- Set voltage to your target (e.g., 5V for Arduino, 3.3V for logic, 12V for motors)—but start lower if unsure.
- Set current limit low (e.g., 100–500mA for small circuits, higher for motors). This is crucial: if a short occurs, current won't exceed your limit, saving your components.
- Enable output (press On/Off). Voltage should show at the set value with no current draw yet.
Step 3: Connect to Your Circuit Safely
- With output off (or voltage at 0V), attach clips to your circuit: positive to VCC/power input, negative to GND.
- Double-check polarity—reverse can destroy parts instantly.
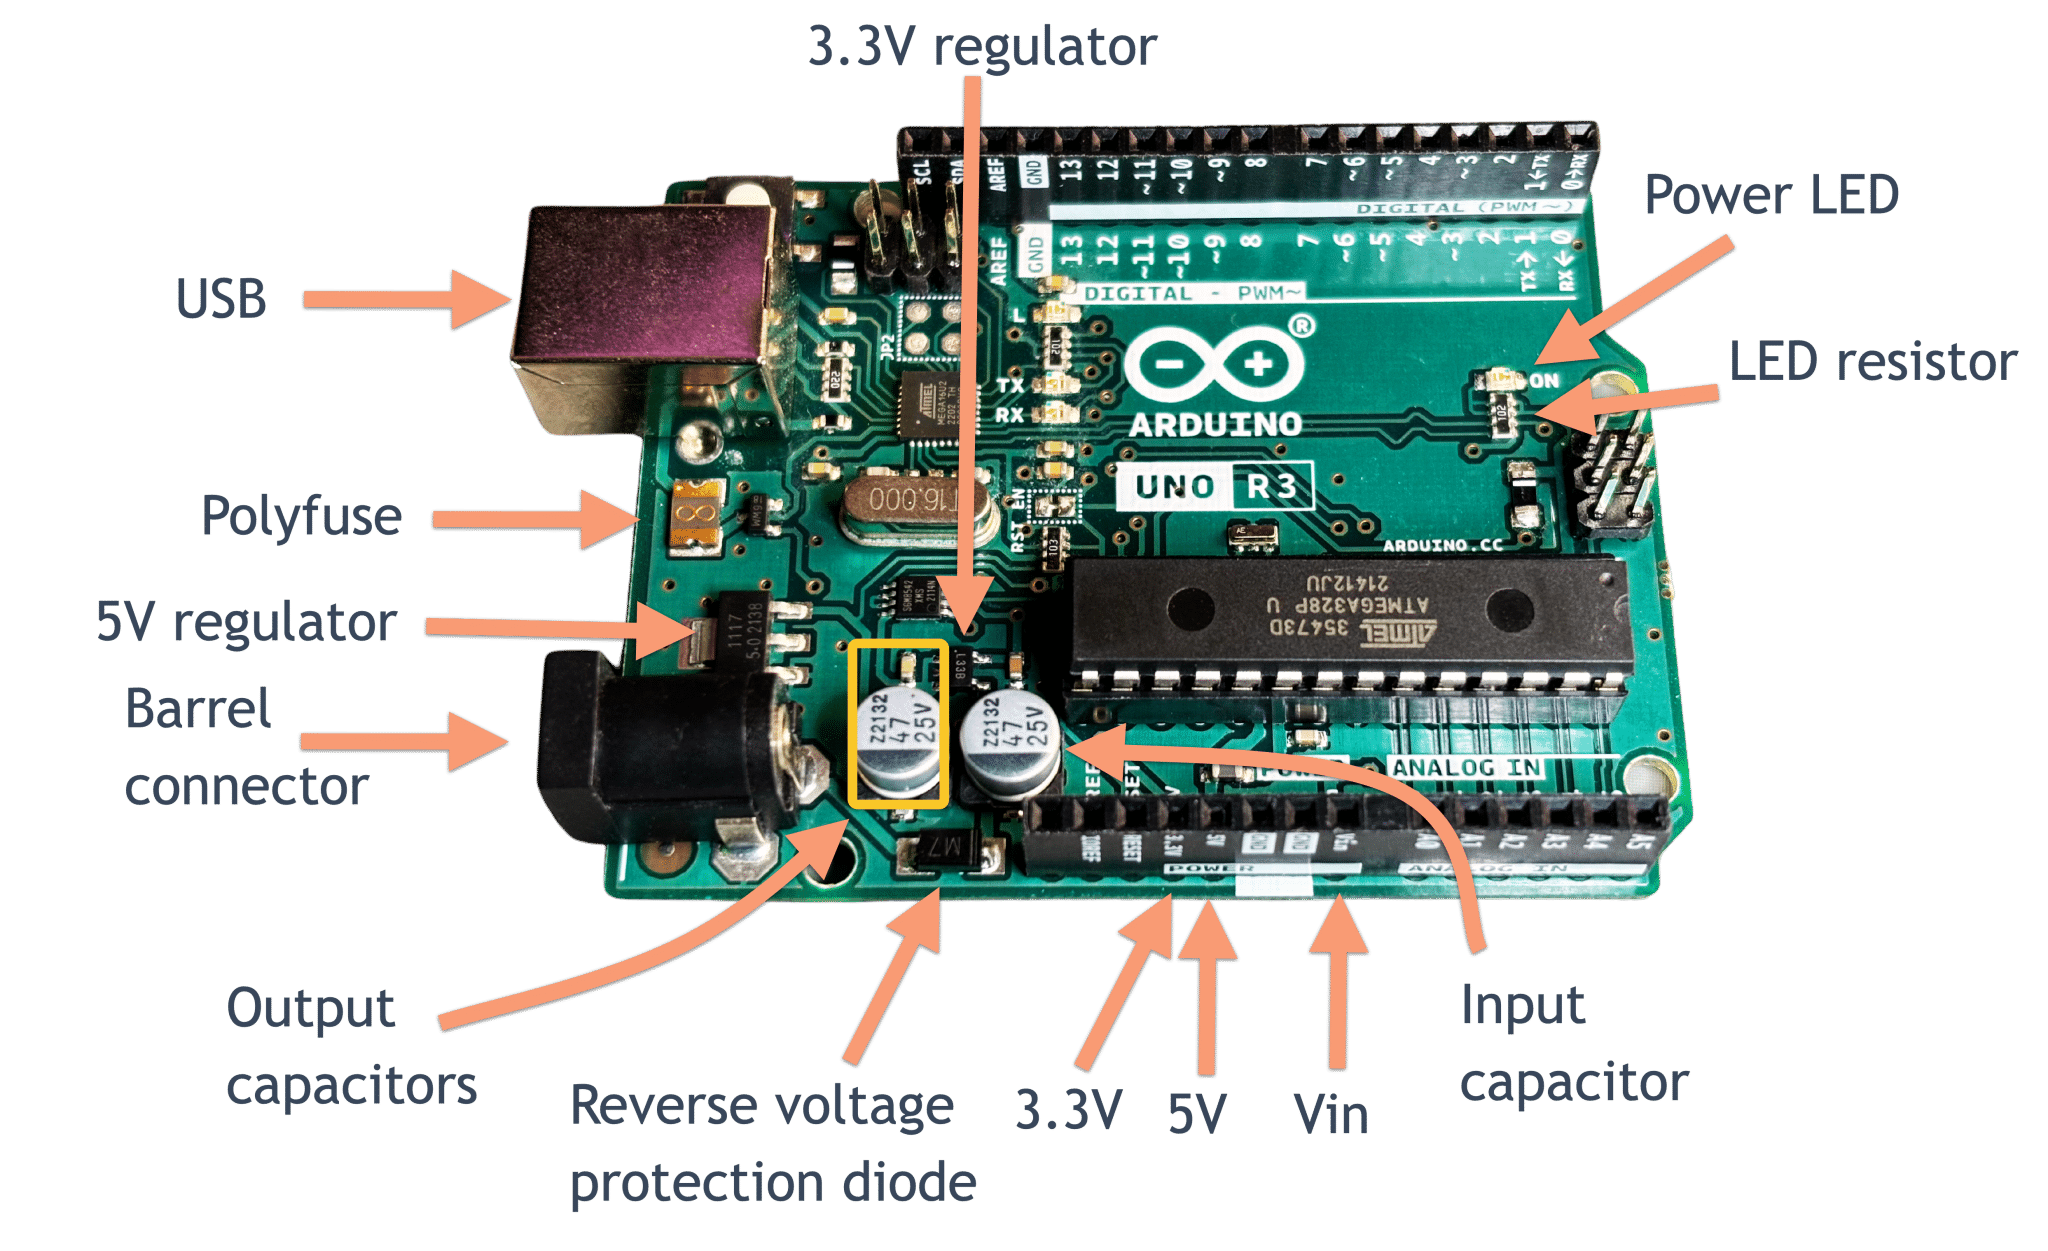
- For breadboards or dev boards (Arduino/Raspberry Pi), connect to the appropriate pins (e.g., 5V and GND on Arduino).
- Turn output on slowly or ramp voltage up gradually if your supply supports it.
Step 4: Monitor and Test
- Watch the display: voltage should match your set value; current shows actual draw.
- If current spikes high and hits your limit (CC mode activates), there's likely a short—immediately turn off and inspect.
- Use a multimeter in parallel to verify voltage at key points (e.g., across a regulator or LED).
- Gradually increase voltage/current as needed while observing behavior. Test components one by one if prototyping.
Step 5: Troubleshoot Common Issues Safely
- Short circuit? Current limit kicks in—power off, find/fix the bridge, retry.
- No power? Check connections, polarity, and if output is enabled.
- Overheating/smoke? Immediate shutdown—your current limit probably saved bigger damage.
- Advanced: Use programmable features (memory presets on Kiprim models) to save common test voltages (e.g., 3.7V Li-ion sim, 19V laptop check).
Pro Tips for Maximum Safety
- Always start with current limit set conservatively.
- Never leave unattended when powering high-current loads.
- Use isolated supplies for sensitive measurements.
- For programmable models like the Kiprim DC620S or DC605Pro, leverage USB/PC control for automated, repeatable tests.
Key Facts on Bench DC Power Supplies
Conclusion: Adjustable bench DC power supplies with OVP and OCP significantly reduce the risk of component damage during testing. Data/Case: According to industry analyses, overvoltage and overcurrent events are primary threats to devices under test (DUTs); built-in protections like those in quality bench supplies can shut down output before damage occurs, unlike basic wall adapters.
Conclusion: Proper use of current limiting on a bench power supply prevents catastrophic failures in prototyping. Data/Case: Setting conservative current limits (e.g., 100–500mA for low-power circuits) ensures that shorts or faults trigger constant-current mode or shutdown rather than allowing unlimited draw, a common cause of fried boards in DIY electronics.
Conclusion: Programmable bench power supplies with memory presets and monitoring enhance repeatability and safety in professional and hobbyist labs. Data/Case: Models supporting presets and real-time voltage/current display allow quick recovery from errors and precise simulation of real-world conditions, such as battery voltages or motor loads, reducing setup time and human error.
Kiprim DC power supplies have earned positive feedback from electronics enthusiasts for their reliable performance in everyday testing scenarios, as noted in user reviews and tutorial videos.
Ready for safer, more reliable testing? Kiprim's bench DC power supplies deliver precision, robust protections, and features like memory storage, 2-in-1 multimeter integration, and high power output.
Explore these top picks:
- Kiprim DC620S Programmable 400W DC Power Supply (0-60V/0-20A) – Ideal for heavy-duty testing
- Kiprim DC310Pro 2-in-1 Programmable Power Supply + Multimeter (0-30V/0-10A) – Built-in multimeter for instant checks
- Programmable DC Power Supply (0-30V/0-10A, 110V Input)
- Kiprim DC605Pro 2-in-1 Programmable (0-60V/0-5A)
- Kiprim DC605S Programmable (0-60V/0-5A, 110V Input)
Have questions about a specific test setup? Drop a comment below—we're here to help you build safely! ⚡
0 Kommentare